Check them out as well. It makes a wonderful collection.
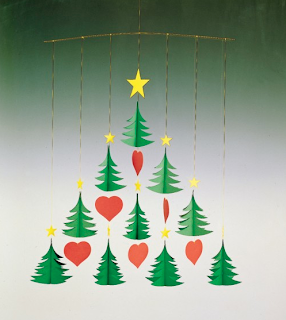
Here is a great example of a Swedish Tree mobile incorporating the simple heart form. I found this on Houzz.
Supplies needed for the heart screen ornament:
- 1 piece aluminum window screening 2" w x 11" long - I purchased 1 roll of 36" x 84" bright Aluminum screening at Lowes. You can vary the size to create different sized ornaments.
- 7 - 1/2" wooden red beads - I bought a red bead garland and cut them off.
- 2 feet 1/8" wide green satin ribbon
- dull scissors (Save your old ones for this type of project. Don't use your sewing shears!)
- big darning needle (large enough to thread 1/8" ribbon through)
- gloves - to protect your hands
- ruler
- marker
Steps:
- Using a Sharpie marker and ruler measure 1 piece of screening 2" w x 11" long.
- Use dull scissors to cut the screening. I like to wear garden gloves during these first steps because the edges of the screening are extremely prickly.
- Fold over both long edges along the entire length of the strip.
- I bent it over the edge of my desk top to form a straight fold.
- I used first my finger to crease back the folded edge and then ran the handle of the scissors along it to smooth it out.
- Cut the ribbon into 1 piece - 11" long.
- Pull a strand of aluminum "thread" off the edge of a scrap piece of the screen material.
- Fold the strip of aluminum up curving the two short edges in to create the top of the heart.
- Use the aluminum thread to "stitch" the two ends together. I attached them at both sides about 1/4" up from the end and twisted the aluminum thread to hold.
- Take a longer aluminum thread and stitch the entire seam together to hold it in place.
- Now carefully shape the bottom of the heart working to get a crease right in the middle.
- Crease it in a sharp fold. Keep the top nicely rounded.
- Cut a piece of 1/8" red satin ribbon to 2 feet.
- Fold it in half and tie a knot in it 3" down from the fold. This will form the loop to hang the ornament from.
- Thread both ends of the ribbon into the darning needle.
- Thread the needle down through the center of the top of the heart.
- And then thread it out through the center of the bottom of the heart.
- Tie a knot below the heart up tight causing the space between the beads to reduce and the heart to plump up. The knot will help hold the heart shape.
- Thread each half of the ribbon through 2 more beads with knots below them at the rnd of the ribbon.
Hang this ornament on your tree along with all the other screen designs.
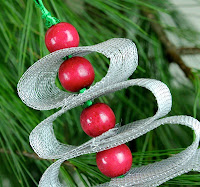
Here are photos of other ornaments I have created using similar materials but different techniques. The links are to tutorials. I have made all of these and many more with just the one roll of aluminum screening!
Previous Posts of Interest:
- DIY Christmas Ornament #3 • Daisy
- DIY Christmas Ornament #2 • Rosette
- DIY Christmas Ornament #1 • Tree Ribbon
- Handmade Christmas Cards Through the Years
- DIY Christmas Cards • Pierced Designs
©2011 Ashbee Design, Marji Roy


love you holiday designs...i work with metal wire mesh and flashing as well to make my modern danish ornaments.
ReplyDeletedid i say love?
i do.
love your work.
karen
PS Just posted your link on my FB Topless Bread (danish food blog) as another ornament idea.
ReplyDeletehappy holidays!
k
that is super cute, especially the heart. love it!
ReplyDelete