I love the "Keeping it Real" posts that fellow bloggers post. We all know that we share the best photographs and that often the other side of a room is a disaster. I will be showing to you the disaster that I spent the Memorial Day weekend rectifying. That would be the tool shed. It was embarrassingly disorganized and non-functional. But thanks to bloggy inspiration, today it is not!
Today, our garden tools stand at attention in organized (and labeled) fashion. And I used PVC pipe to achieve this task. But first here is the before photo.
There is utter chaos in here. The floor is piled deep with tarps and tools that have no home. There are many tools we just can't find anymore. So I started by emptying out the entire tool end of the wood shed. I organized it all on the driveway. It seemed to stretch for miles. Job number one was purging and identifying the trash. I had no problem there.
Then I started planning, arranging, looking at the space. I determined that it would help a lot to add an additional shelf for storing tarps so I started there. As you read this post understand that there is no light in the tool shed. I brought in a little clip lamp so I could see but photography was absolutely a challenge. I was doing this project from salvaged materials, reclaimed wood, etc. The tools shed is part of our woodshed, it has a dirt floor, no windows, spiders, mice and an occasional squirrel. This is not a place for fine woodworking!
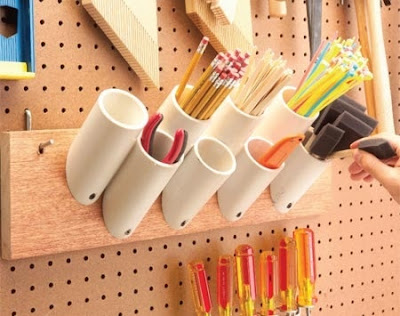
Next I had to deal with the garden tools. This project all started from an inspiration in a post I had pinned previously. It is a sketch from
Living the Country Life. The suggestion is to use 12" lengths of PVC pipe to create a tool holder.
I knew a variation would work in our tool shed. I had some PVC left over from a sculpture project posted
here. (Side note- following that link is worth it if you don't know about our sculpture week. Risk it and take a look!) Instead of the suggested format, I cut the PVC scraps at an angle (approx. 30º) into 6" pieces and mounted them at the mid point and bottom of my shed wall. Here are the cut pieces. I saved the short end pieces and I was glad I did.
First I cut the pieces to length at an angle on the band saw. A band saw isn't required but because I have access to one, I used it.
We have a lot of tools so I made a lot of PVC holders. After cutting, I sanded off the plastic shreds.
I then drilled holes into each end. The reason for cutting the pipe at an angle was to have clear access to a drill hole for attaching these to the wall.
When I emptied out the tool shed I found an old piece of 3/4" plywood from a project from 35 years ago (I can't believe I have saved it for 35 years - I finally found a second use!) With the help of David I screwed that to the studs to separate the wood storage area from the tool area. That gave me a new wall surface to store tools.
I next started arranging the tools in an order that maximized use of the space. It took almost no time at all to screw the PVC holders into the plywood divider. And I popped those tools in there just to get a peek. Oh,yes!
I still had all the small tools to deal with and decided to make use of some of the space between the studs on the exterior wall. I cut a scrap of wood to serve as a face plate and, to the back, I attached some of the smaller PVC rings left from cutting. We had always used this space for the hand tools but they slid down and got lost in the darkness. My goal was to create a grid that would hold them in place. Here are the rings attached to the back side of the board. The spaces are where the studs will be.
Here it is in place. I screwed it into the studs and...
Moved in some tools......
I continued moving in the tools and the items needing to be stored on the shelves. I was very pleased with how well everything fit, and how accessible it would all be.
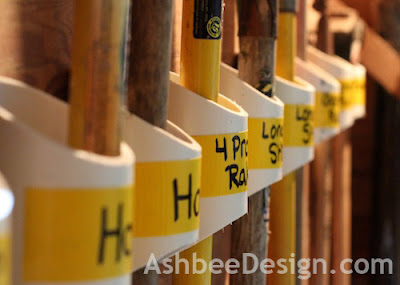
But, I have learned. Spaces only stay organized if everything has a home and that home is labeled! So out came my collection of colored duct tape.
I decided to use yellow because of the lack of light. Hopefully it will be readable in the gloom. So here is the tool shed in all its organized glory......
The new tool wall - with labels!
The original tool wall, thinned out, reorganized and labelled....
I used more of the little rings for odds 'n ends. Here are some arranged for brushes. I didn't even know we owned these!
And here is a detail shot of how the angle cut at the top and bottom of the PVC allowed easy access to screw these hangers to the wall.....
And for the curious, the outside view. David is about 1/2 way done with getting in the wood for next winter. The verticle lumber helps with the cord wood stacks and keeping an opening to the tool area. The tool storage area is to the right behind the solid wall.
If you have been following my blog for awhile you might notice the similarity to another project on a smaller scale. Check out my
Measuring Cups and Spoons post, too. See the PVC?
It was a very productive weekend! Did you find time for any projects?
Previous Posts of Interest:
Sharing this Post at these Sites:
©2012 Ashbee Design, Marji Roy


