Saturday, September 29, 2012

It's All About Sharing

We all love to receive comments and I like it when they lead to interesting follow through. Here are a couple of examples that have evolved from my book page projects recently.

First Babs from Upstairs Downstairs wrote that she too had made leaves from book pages but had never thought to color them. I followed the link back to see her project and I found this lovely arrangement she created for her door using book page leaves.


I love the natural colors and combination of materials. And if you follow my blog you know I have a weak spot for branches. I have made the leaves with both paint and brilliant colors and leaving them natural. I love them both.

And I just received a photo in my e-mail from Colleen out in Oregon. She had e-mailed me requesting permission to make book page leaves and flowers like these for her library's fund raiser. She sent a photo of the flowers she made to help and the display at the sale library.


Hope it helped the cause. I, too am a library supporter (but not opposed to using old books in craft projects!)

Keep sharing, folks!


Previous Posts of Interest


©2012 Ashbee Design, Marji Roy


Monday, September 24, 2012

Ornamental Grasses Indoors

The trend of using ornamental grasses in landscape is an exciting one. I love the dynamic vertical lines combined with swooping arcs they add to the composition. I wondered how they would do indoors. I picked some of the wispy fronds and constructed a quick contemporary arrangement for my sunroom.

I love the dramatic effect - and the cost! I especially like the mini compositions within the whole.


A stunning vase helps. Try it. Quick, easy and dramatic.

Previous Posts of Interest


©2012 Ashbee Design, Marji Roy

Sunday, September 23, 2012

Beautiful Find on a Fall Walk

When you were young did you ever have the chance to romp about in the woods, climbing trees, scaling boulders and exploring the dense green under story? I have special memories of doing that regularly and yesterday I went on a fall walk that turned into a similar memorable experience. David and I teamed up with our neighbor, Sue and set out for a ramble in her woods. It turned into a exploration as we bush-wacked deeper and deeper into the forest. We climbed a rocky ledge back there, meandered through dense Mountain Laurel, found a deer skull and just had a great time. We emerged from the woods onto the road just as dusk was settling into early evening and a brilliantly patterned leaf caught my attention. There, on the side of the road was a grape vine with leaves in mid-cycle of turning their fall colors.  I found them beautiful and picked four.


Each leaf was the size of my palm and they were filled with shades of green and yellow with touches of red for contrast.

I found a hand thrown clay stem vase in my collection. It was perfect for arranging the leaves.

It is now adding a touch of color on my bathroom vanity. I hope they will last for a few days before wilting.

Notice, I didn't include any photos of me climbing the tree. I did and it wasn't a pretty sight - funny but not photogenic. I'll leave it to your imagination!

Have you found anything noteworthy during your fall wanderings? 

Previous Posts of Interest

©2012Ashbee Design, Marji Roy


Saturday, September 22, 2012

Wood That Works Sign

My husband David designs and builds wooden kinetic sculptures. In the process he creates all kinds of phenomenal wood scraps. We recently used a couple of the leftovers to create a new and unusual sign for his studio.


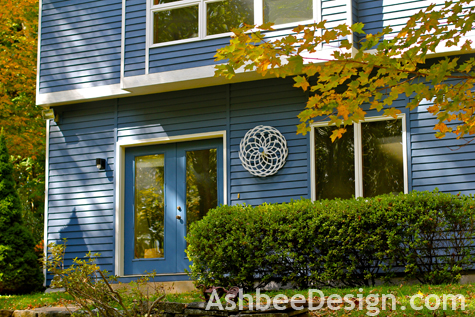
We live in a rural area with residential/agricultural zoning. Although we can have a home business, it can't look like a business. It has to maintain the residential character. David's workshop and gallery are located in what appears to be the house next door. He wanted a sign to let people know they had reached the right place when visiting - but not a commercial sign. He suggested using the discarded wheels from his pile of interesting scraps. We took two wheels that had originally been designed for his Fireworks piece, painted them white and used them for the sign.


While designing Fireworks David experimented with the optical patterning of a variety of wheels and some worked better in combination than others. Below is the finished design. 

Take a minute to watch the YouTube video of Fireworks. The sculptures really need to be seen in motion!


From scrap heap to spray painting.......


To a new sign.....


You can tell fall is approaching. The maples and ash trees are staring to sport traces of yellow in the leaves.

Previous Posts of Interest
©2012 Ashbee Design, Marji Roy

Thursday, September 20, 2012

DIY Failure • But Nest Building

Back in July I shared with you the wood branch divider I created to disguise our gas grill. I then did a tutorial on wood slice flowers that I crafted to embellish the divider. I learned that using hot glue for exterior uses is unwise and I posted about that switching to epoxy for future wood slice flowers.


I was surprised when I looked out this week and saw that not 1 or 2 but nearly every single wood slice flower was lying on the ground!


I was truly dismayed and thought I'd had a major glue failure but on closer inspection I learned something new......

The glue had held, the jute I had used to hang each flower was gone.....totally missing. I then realized that some little critter had eaten through all the jute and stolen it for nest building. I liked the jute because of its rustic appearance however I guess it wasn't a good solution! Will have to try something else. I hope the little thief will be cozy this winter!


Previous Posts of Interest:


©2012 Ashbee Design, Marji Roy


Wednesday, September 19, 2012

Beautiful Objects • Tape Dispenser

Yesterday I saw this inspiring design and had to stop and research it futher. It is a concept for a new approach to the standard tape dispenser and it is a beauty. I would give this functional sculpture a prominent place on my desk top!


Source: Matt Pacione


Source: Matt Pacione

These are designed by Matt Pacione, a Canadian industrial designer and recent design school graduate. I love the twist and angle. Matt won a 3M design contest back in 2009 and this dispenser was to be produced. I haven't found it anywhere. Anyone know where to get one?


Previous Posts of Interest

©2012 Ashbee Design, Marji Roy


Tuesday, September 18, 2012

Book Pages Leaves • Natural

I have spent the past two weeks making leaves from book pages and most of them have been painted the colors of fall. I decide to leave one batch of oak leaves unpainted - just the natural color of an aged book - and create a fall tablescape in natural tones. These I attached to branches painted black.


I made three branches, added them to my book page basket (tutorial here) along with a scattering of found feathers for a fall arrangement in muted tones.

I started by making a slew of leaves from strips of pages from old books. I posted extensive tutorials on how to make these leaves here.


I made a bundle, painted some for other projects but left about 30 natural for this arrangement.


Creating the arrangement started with a hot pink flower pot my daughter gave to me when I visited last week. I knew it would great spray painted matte black. 

I then experimented with an idea I'd seen on Pinterest from Doodles, Dabbles, & Dreams.  I used Great Stuff insulating foam to hold the sticks in the pot. I am pleased to report that it worked like a charm and better than many other things I have tried. I even hard a partial can left in the closet! Recycled books, pot and finishing up old supplies!


After spray painting some twigs black, I arranged them using painters tape to hold them in place. I sprayed the foam into the pot trying to not over fill because of the foam expansion.  I left it over night to cure and the results are excellent. The branches are held firmly in place. It made working on it much easier.


I used hot glue to glue the leaves onto the branches.  Notice the coffee can? It has about 2 " of small rocks in the bottom and I use it as a holster for the hot glue gun. It keeps it off my work surface and it doesn't matter if some of the hot glue drips on the rocks below.  

I put a small amount of hot glue on the leaf and then held it next to branch. I had a pencil ready to push it in place with out burning my fingers!


And I just kept adding them.....

And adding them....
I added some other treasures from my collections to the grouping and took photos to share.

But then I also added a touch of fall color to the arrangement. I think I love the sereneness of the all natural interiors but my inner self pops out into color every so often!


Dont' miss all my other posts about the other arrangements I have made using the book page leaves, and the tutorials. Links to all below.

Previous Posts of Interest

©2012 Ashbee Design, Marji Roy

I'll be sharing this at the following link parties this week. Check them out for other fall ideas.

Hope to see you there as well!

Saturday, September 15, 2012

Book Page Birch Leaves • DIY

This is the third post in my series on making colorful autumn leaves from book pages. The directions for crafting a birch leaf follows. I am calling this a birch leaf although there are many leaves that have the pointed almond shape. I probably should have started with this leaf because it is by far the easiest, but it is also the plainest. Its shape is simple but I found the collections of leaves needed the birch leaf. It turns bright yellow and the russet oak and red maples needed the yellow to enhance the arrangement. Check out my previous posts for additional display options here, maple patterns here and oak leaves here.  


Tutorial:
Supplies needed: 
  • Old Book - not too old - Avoid ones with brittle pages
  • Cutting blade- Exacto
  • Cutting mat
  • Metal ruler
  • Paper glue- I used Elmer's Craft Bond Memory Book Glue Pen (Wet)
  • Paper Clips
  • Scissors
  • Spray paint in fall birch colors - yellow, brown and green

Steps:
  • Cut the about 5 pages from the old book.
  • Using the cutting tool and the metal ruler cut the pages into strips vertically 5/8" wide.
  • Cut the strips into the following lengths. You will need this many for each leaf. I cut a stack of each size.

2 - 5 1/2"
1 - 4 1/2"
2 - 3 1/2"
  • The individual steps for assembling these strips follow but here is an illustration showing the assembly order.


    • After cutting the strips, I arranged them in the order listed in the diagram. 
    • I then curled each of the strips slightly by pulling it over the edge of my work surface. I did not curl the tallest, center piece.


    • It was helpful to line up the pieces in order. Notice, the curls go in opposite directions on each side of the long center stem.
    • Fold back 1/4" on one end of the 2 shortest (3.5") strips.

    • Glue the bottom edge of all 5 together in a stack in the order shown above and in the diagram. Pay attention to the direction of the curves.
    • I used a glue that took about 15 minutes to dry. I could then reposition strips as I needed. I tried it with my adhesive strip dispenser but that didn't allow me enough flexibility. I found that Elmer's Craft Bond Wet Memory Book Glue Pen worked well.

    • Paper clip the stack together to hold it in place while it dries and you continue working.
    • Next glue the top end of the 2 - 5.5" out strips and the 1 - 4.5 center strip. Do not glue in the 3.5 inch strips with bend yet.

    • Last glue step is to glue the 2 inner veins (3.5" pieces with bends) to the sides. Add glue to the small portion your previously bent over and clip it to the outer edge. 


    • Start another leaf as this one dries. You will want a collection to decorate with.
    • Once dry, remove the paper clips.
    • Using scissors you can clip the tips of each point to soften the points. (Optional)
    • Set-up a spray painting area in a well ventilated location. 
    • Collect spray paint in fall colors. For the birch leaves I used a yellow base. I then added touches of brown for older leaves, and touches of green for those just starting to turn. The variety works well in arrangements with other leaves.

    • Spray lightly and from different directions. Do not cover the paper. You want the lettering on the old book page to show through.
    If you haven't already started making maple and oak leaves to go with the birch leaves, follow the links below for directions for the different shapes. Have fun and send me pictures of your creations!

    Previous Posts of Interest


    ©2012 Ashbee Design, Marji Roy